Showing posts with label crazy cooking challenge. Show all posts

Wednesday, November 7, 2012

Cornbread and Sausage Dressing

This month's Crazy Cooking Challenge was for stuffing/dressing.

Photobucket

As many of you have experienced, the stuffing/dressing debate is probably one of the most hotly contested one early in a marriage. Both parties want what they grew up with (as long as their family made a good one). Lucky for us, we both came from a heavy sage/white bread stuffing legacy. There were some differences but we've melded together to create the best stuffing ever. Literally we could stand and eat the raw dressing (we don't use eggs) before we stuff the turkey.

But for the challenge I wanted to try something new. Since we normally make white bread stuffing, I thought I'd go the other way and try a cornbread recipe. So after hours of searching and weeding, I presented Dan with about 5 versions. He picked this one.

Cornbread and Sausage Dressing
Recipe courtesy of AllRecipes.com


1 (12 ounce) package corn bread mix
1 pound sausage, cooked and drained
1 tablespoon butter
3/4 cup chopped onion
3 stalks celery, chopped
1 teaspoon dried thyme
2 teaspoons ground sage
1 teaspoon garlic powder
1 teaspoon salt
1/4 teaspoon ground black pepper
1 cup vegetable broth

Directions

1. One to two days ahead, make one pan of cornbread according to the box instructions. Let this sit out overnight and get a firm (almost hard) crust.
2. Place sausage in a large, deep skillet. Cook over medium high heat until evenly brown. Crumble, drain and set aside.
3. In a skillet, cook onion and celery in butter until soft. Remove from heat, allow to cool.
4. In a large bowl, combine crumbled cornbread, sausage, onions and celery. Add sage, garlic powder, salt and pepper. Mix well.
5. In 1/4 cup increments, add chicken or vegetable broth to stuffing mixture. Toss gently until evenly moist. Loosely stuff in fowl or casserole dish and bake at 350 degrees F (175 degrees C) for 30 minutes or until heated to 160 degrees F (70 degrees C).

We halved the recipe and it made a lot for just the two of us. My first thought was it seemed so loose compared to our normal dressing. But it was moist when I added all the broth so I didn't add anymore. The photo on the original recipe looked loose so I went with it. It didn't firm up any while cooking (as you can see from my photo). If I were to make it again, I would cut back on the sausage. I thought that it overpowered everything else. I also would add more seasoning. You have to understand that when we make our normal stuffing, we probably triple the amount of sage it originally called for. We just love that.


Final verdict - I'm glad I tried something new with just Dan and I. But we'll be serving our normal stuffing on Thanksgiving.

Check out what everyone else made below.

Sunday, October 7, 2012

No Sugar Apple Pie - Crazy Cooking Challenge

Photobucket

It's back! Yes, the Crazy Cooking Challenge in its year two format. You can get your recipe from anywhere, even make it up yourself. While I would not do that, I will go to Allrecipes.com to look for one.

This month is apple pie. Dan loves apple pie so much that I've actually made it for his birthday before. One of my early cooking memories when married was when I wanted to make him one. I didn't realize that paring an apple meant to peel it. Needless to say I have learned since then.

Since we are trying to cut back on calories and our normal recipe has lots of brown sugar, I wanted to find one that had none. Enter the no sugar apple pie. Dan was skeptical since he loves that brown sugar goodness but since I was cooking him a pie, he let me go for it. I don't make my own crust after the thanksgiving debacle years ago that had me breaking down in tears so I used store bought crusts. I think they taste fine.

No Sugar Apple Pie
Courtesy of allrecipes.com

6 cups thinly sliced apples (I used gala and Granny Smith)
3 T cornstarch
1 T ground cinnamon
12 ounces unsweetened apple juice concentrate
2 pie crusts

Preheat oven to 350 degrees.

Whisk together cornstarch, cinnamon, and 1/4 apple juice concentrate.

In a saucepan over medium heat, simmer the apples in the remaining apple juice until tender. Add the cornstarch mixture and stir until thickened.

Pour into bottom crust and cover with top crust. Bake for 45 minutes.

Pretty easy. The longest part was peeling and slicing apples. The taste was very cinnamony. I would cut that back because you could taste the rawness of that much cinnamon. I really didn't miss the sugar. Dan said that if you didn't know it was no sugar you would think it had it.

I'm not the best at making my pie look pretty.


I think this would be a nice dessert to have if you have a diabetic in the family.


I wonder how many apple pie recipes people will come up with. Look at the list below to find out.

Powered by Linky Tools
Click here to enter your link and view this Linky Tools list...

Tuesday, August 7, 2012

Crazy Cooking Challenge - No Bake Oreo Cheesecake

Photobucket

After taking a couple of months off from the challenge, I had to rejoin when I heard the recipe of the month was cheesecake. I love cheesecake even if it doesn't love me. Who can resist all that creaminess and so many different toppings/flavors? All you have to do is look at the cheesecake menu at The Cheesecake Factory and you know what I mean.

Of course with it being the hottest part of the year (100+ temperatures...yuck) and a baked cheesecake takes at least an hour to cook, I decided to make a no-bake one. I would so love to try my hand at baking one again. My last attempt didn't turn out at all like the picture in the recipe (Pumpkin Cheesecake) but it was still tasty. But I wanted no-bake. After consulting with my dessert expert (Whitney) we decided we wanted an oreo cookie cheesecake. If I'm going to eat all those calories, by golly I'm going with something that has chocolate in it. And who can pass up an Oreo? It is after all the 100th anniversary of that cookie.

I searched all over the place for a recipe. I did find one that looked delicious but my goodness the amount of steps and stovetop cooking needed to make it just made me look elsewhere. Since the rules changed last month about being able to use a recipe from anywhere, I went to the Kraft website. (I know I took the easy way, but I'm serious about not turning my oven on for 2 months). There I found a recipe that looked easy and delicious. So I made it.

No Bake Oreo Cheesecake
(recipe from Kraft Foods)


9 OREO Cookies, divided
1 tub (8 oz.) COOL WHIP LITE Whipped Topping, thawed, divided
1 pkg. (8 oz.) PHILADELPHIA Neufchatel Cheese, softened
1/2 cup sugar
1 cup vanilla low-fat yogurt
1 OREO Pie Crust (6 oz.)


HALVE 4 of the cookies; reserve for garnish. Finely chop remaining cookies; set aside. Remove 1 cup of the whipped topping; store in tightly covered container in refrigerator to use as a garnish.

BEAT Neufchatel and sugar in large bowl with electric mixer on medium speed until well blended. Add yogurt; mix well. Gently stir in the remaining whipped topping and the chopped cookies. Spoon into crust.
REFRIGERATE 3 hours or until firm. Top with the reserved whipped topping and cookie halves just before serving. Store leftover pie in refrigerator.


So the changes I made to the recipe was I used a chocolate pie crust. I couldn't find a oreo one. (I think the oreo one would have added something so if you have one, use it). I also put all of the cool whip into the cream cheese mixture and didn't keep any out. I think it helped make the filling a little lighter. We also used the reduced fat oreos. I had no idea they made so many different types of cookie now.

I figured out the calories of one slice (1/8 of the pie) was 375. Which for a cheesecake isn't too bad.
Our overall impression was that it was tasty but we missed a real cheesecake's density and flavor. It had a tang to it but not as pronounced as when you use real cream cheese. I did appreciate that it was cold and didn't heat my house up to make.


Let's go see what other delights people came up this month!

Monday, May 7, 2012

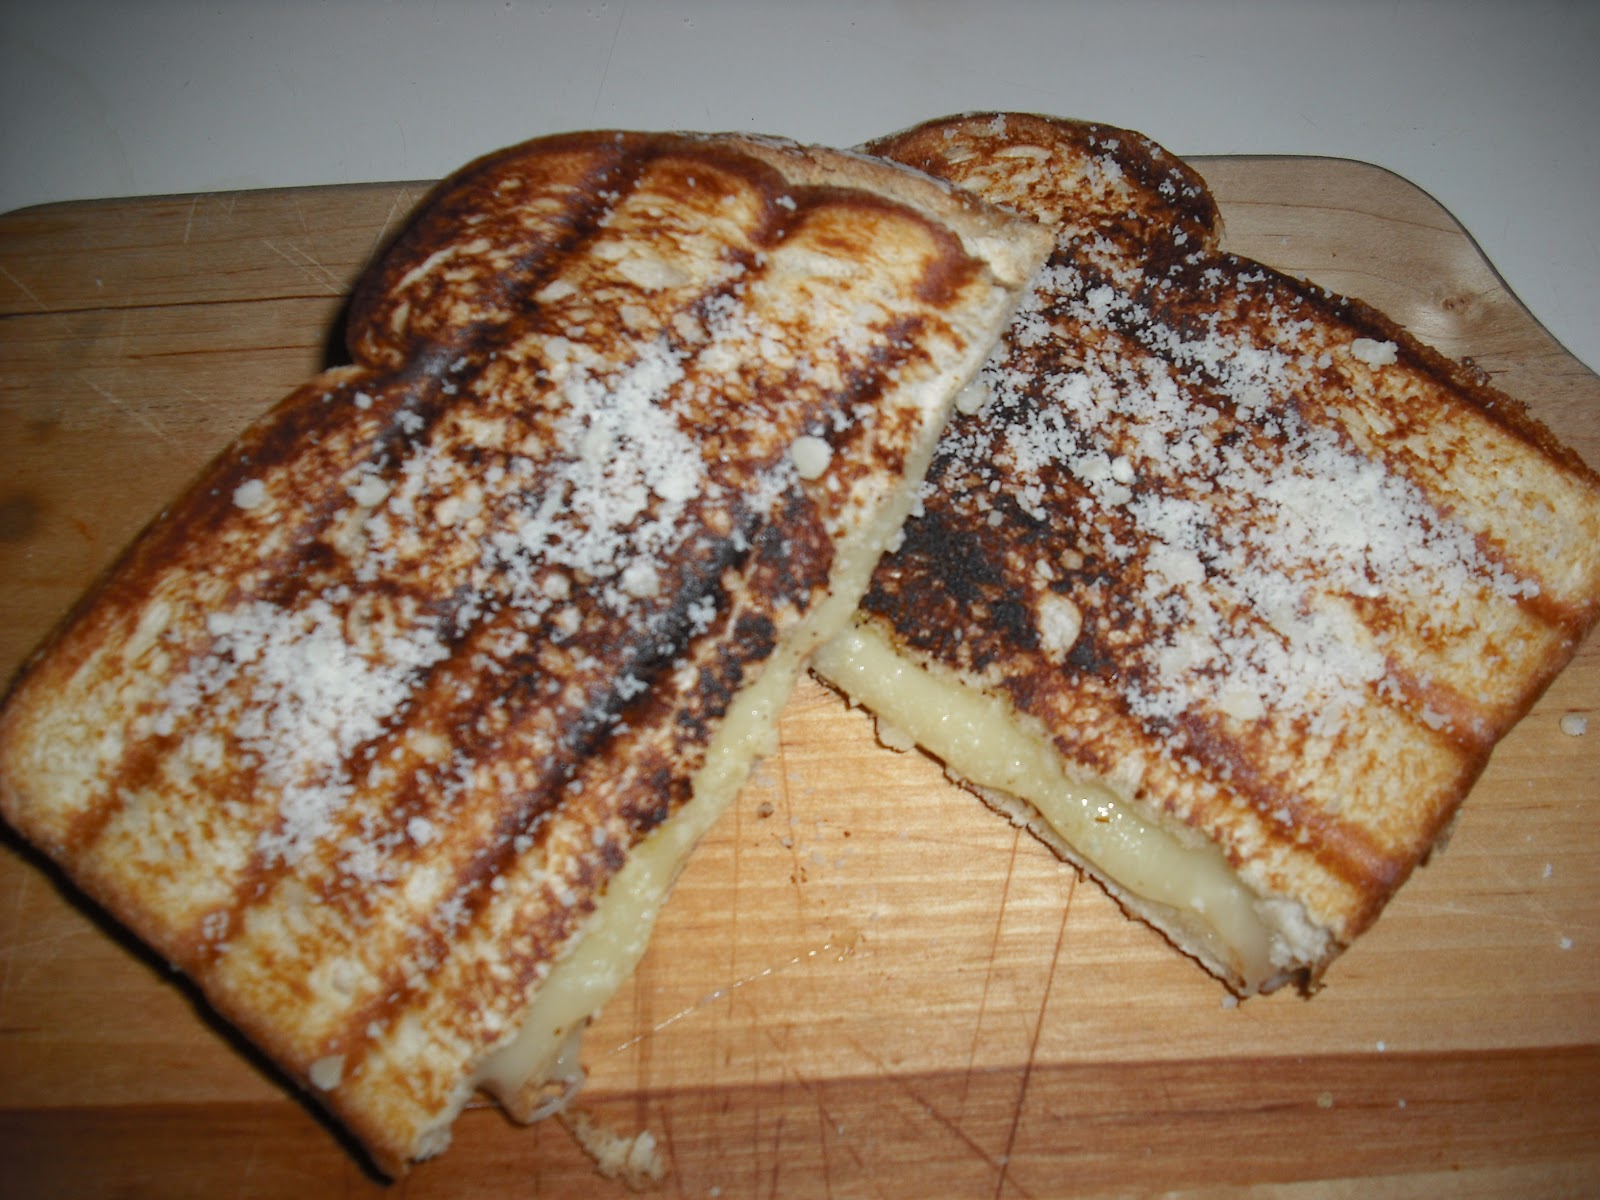
Grilled Provolone/Parmesan Panini - Crazy Cooking Challenge

Photobucket

This month's CCC is Grill Cheese. Who doesn't love grilled cheese? I thought how many people actually blog about making a grilled cheese sandwich however. To me nothing beats a couple of slices of velveeta on some buttered bread that I cook on the stove. Yummy good meltiness. But that sort of defeats this whole purpose of finding a recipe on the same topic as about 100 other bloggers and making it. So I had to think...what kind of grill cheese recipes could I find. After much thought it came to me...PANINI. We love paninis, having our first one in Paris many years ago. There was just something comforting in being in a foreign country and having a taste of home...well at least familiar flavors if in a somewhat different package. So I went on a quest for recipes for paninis that have cheese in them. The only requirements this month: bread, cheese and hot.

It was a struggle initially to find recipes. Seems like I haven't quite figured out how to search multiple blog sites at the same time but I do know have an infinite number of blog sites. So this is just time consuming. I found several I liked and I knew that this would be one that Dan could get into. I gave him several choices and we are actually making a couple of them. Normally when we make paninis at home we just use good sourdough bread slices with deli meat and cheese.

The recipe I chose was from Jennifer at Mother Thyme and her Parmesan Grilled Cheese Panini with Basil Pesto Dipping Sauce. While researching, this was the first recipe I found. It actually was the one I wanted to make most but we made another one first (which was tasty). I ended up making this for a night when I was eating by myself and I'm so glad I did.  Jennifer said it was the best grilled cheese she ever had and I have to agree. It was PERFECT! This recipe made me say "This is what I've been waiting for in the CCC!"

I only made one small change and I can't wait to make it again. This will definitely be my go-to grilled cheese sandwich.


Ingredients
Butter spray (like Olivio or if you prefer spread bread lightly with regular butter or brush with extra virgin olive oil)
4 slices fresh bakery Italian bread
4 slices provolone cheese (or if you prefer mozzarella or cheddar)
2 tablespoons grated Parmesan cheese
Salt and pepper
Basil pesto

Directions
Spray non-stick cooking spray on panini maker or non-stick skillet and preheat over medium heat. 

Lay out bread slices on a large platter, cutting board or plate.  Spray, butter or brush each side of the bread.   Sprinkle with grated Parmesan cheese and a dash of salt and pepper on each slice.  Place two slices of cheese and place on one slice of prepared bread.  Top with remaining slice.  

Place on preheated panini or skillet and cook until bread is toasted and cheese is melted.  

Sprinkle top with a little more Parmesan cheese.  Serve warm with a side of basil pesto.


The only change I made was I used sourdough bread instead of Italian (because its all I had). It only took a couple minutes to cook because the cheese melts so fast. The cheese got gooey without being messy. I had basil pesto already made so I didn't make her recipe. You could eat the sandwich either with or without the pesto. I think I'm drooling as I type this it was so good.


Check out fellow bloggers recipes:

Saturday, April 7, 2012

Crazy Cooking Challenge - Blueberry Crumb Muffin

Photobucket

Month two for my participation in the challenge. When I saw the topic I wasn't sure I would do it. We don't eat muffins. Anytime I have tried to make them, they never come out. Of course I've always used the mix and they seem to stick to the papers or the tin. But I figured Whitney would be home for spring break and this would be a good treat. I printed out about 10 recipes. So many looked similar but I diligently went through them all. I gave them to Whitney to pick out and she narrowed it down to two. I was surprised she didn't pick the chocolate/blueberry one but she said it sounded strange. So we had two with crumb toppings. I chose the one that used a little less butter (since of course muffins are healthy). HAHA.

The recipe I chose was Blueberry Crumb Muffins from Dishing the Divine. Paula said that this recipe was just as good as her favorite muffin recipe. I figure that had to be a good sign.


Ingredients

crumb topping
1 cup all purpose flour
1/2 tsp baking powder
1/4 tsp cinnamon
6 tbsp unsalted butter
1/3 cup light brown sugar
muffin batter
2 1/2 cups all purpose flour
2 tsp baking powder
1/4 tsp salt
1/4 tsp freshly ground nutmeg
8 tbsp unsalted butter, softened
3/4 cup sugar
1/2 cup light brown sugar
2 large eggs
1/2 cup milk
1 pint blueberries, rinsed, drained, and picked over (I used frozen blueberries)

Instructions

  1. Set a rack in the middle of the oven and preheat to 375F. Line a standard muffin pan with paper liners.
  2. For the crumb topping, combine the flour, baking powder, and cinnamon in a medium mixing bowl and stir well to mix. Melt the butter in a small pan. Remove from the heat and add the brown sugar to the pan of melted butter and use a small heatproof spatula to stir them together. Scrape the butter and sugar mixture into the flour mixture, stirring it until the flour is evenly moistened. Set aside while preparing the batter.
  3. Combine the flour, baking powder, salt, and nutmeg in a mixing bowl and stir well to mix.
  4. Combine the butter and sugars in the bowl of an electric mixer fitted with the paddle attachment. Beat on medium speed for about 1 minute, or until well mixed and a little lightened in color. Beat in the eggs one at a time, beating smooth after each addition.
  5. Decrease the mixer speed to low and beat in 1/2 the flour mixture. Stop the mixer and use a large rubber spatula to scrape down the bowl and beater.
  6. On low speed, beat in the milk. After the batter has absorbed the milk, beat in the remaining flour mixture. Stop and scrape down the bowl and beater again.
  7. Add the blueberries to the bowl and beat them into the batter on lowest speed for no more than 2-3 seconds, to crush some of the berries slightly.
  8. Remove the bowl from the mixer and use a large rubber spatula to give a final mixing to the batter.
  9. Divide the batter evenly among the cavities in the muffin pan. Break the crumb topping into small crumbs with your fingertips and scatter over the top of each muffin. Bake the muffins until they are well risen, feel firm to the touch, and the topping is golden, about 30 minutes. Cool the muffins in the pan on a rack


Ready for the oven

Comments: I couldn't believe how thick the batter was. My experience with muffins usually is just the ones you get at hotel breakfasts. I think of them as somewhat light. These were very dense. I kept thinking I had the wrong size muffin tin. I filled up 12 cups to the top and overflowing. Then when I added the crumb topping I had so much extra. And they were pretty covered. I think I overcooked them by a minute (eventhough I pulled them out before the time on the recipe). The nutmeg was pretty strong (I like nutmeg) but I think a little less would let you taste the blueberries. The crumb topping was pretty crunchy (which is why I think I cooked them a minute too long). The next day I warmed one up and then put some butter on it and that seemed to help the denseness. Someone had mentioned that theirs were dry on the original blog and everyone else wondered why. Mine seemed dry too but butter helped.
Out of the oven

The blueberries kept their shape nicely

Would I make these again? No. Not because the recipe was bad its just that we don't eat muffins (in fact I've got most of them in the freezer). And actually with them being in the freezer, they have regained some moisture when we defrost them. Still wouldn't make them again but better this way for us.

Check out all the other versions of blueberry muffins out there.


Wednesday, March 7, 2012

Spaghetti with Meat Sauce - Crazy Cooking Challenge

I've wanted to do a cooking challenge blog for so long. Unfortunately I don't have enough recipes to qualify for Secret Recipe Club. And then I found the holy grail of cooking challenge blogs: CRAZY COOKING CHALLENGE. Basically once a month people cook the same kind of recipe that they found on someone else's blog and then post about it. You don't have to have a lot of recipes on your own blog. This is something I could do. So I signed up for it this month and was so lucky that it was a topic that I like: Spaghetti with Red Sauce. I have so many good recipes for red sauces but the whole purpose of this was to find something new. I spent a week going over other people's blogs to find a bunch of recipes. I'm still learning how to find food blogs so it took awhile. And then I needed to get Dan to agree to one of them.

Photobucket

Spaghetti with Meat Sauce
The recipe I chose was Mom's Spaghetti Sauce by Isabelle at Crumb. I liked it because it had bacon and ground beef. All of the red sauce recipes that I have don't have any meat so I thought this would be a good change.


Mom’s Spaghetti Sauce
6 slices bacon, chopped
2 tbsp olive oil
2 lbs lean ground beef
2 medium carrots, diced
1 small fennel bulb or 2 stalks celery, diced
1 large onion, diced
3 cloves garlic, minced
2 cups dry red wine
2 cans (796 ml each) pureed tomatoes
3 tbsp tomato paste
2 bay leaves
1 tsp dried oregano
1 tsp dried basil
1 tsp hot pepper flakes (optional)
In a large heavy-bottomed pot, fry the bacon in olive oil over medium-high heat until crisp. Add ground beef and cook for 10 minutes, breaking up into small chunks with a wooden spoon as it cooks, until browned. Using a slotted spoon, transfer the ground beef to a bowl and set aside.
Add carrots, celery, onion and garlic to the pot, and saute for 10 minutes or until onion is soft and translucent. Return ground beef to the pot.
Stir in the remaining ingredients, and bring the mixture to a boil. Reduce heat to low and simmer, stirring occasionally, for 45 minutes.
Ladle sauce onto cooked spaghetti and serve with a scattering of grated Parmesan cheese.
Ingredients (Pinot Noir was the wine)
I halved the recipe because I knew this would make a lot. I was surprised it didn't have any salt in it and the amount of seasoning seemed small but I follow recipes to the letter the first time I try them. We cooked it just like it said (I used celery and not fennel) and then tasted it after it simmered for 45 minutes. BLAND just like we were afraid of. I think we added another teaspoon of basil, oregano, salt and some garlic powder to get it to taste like anything. It had a good consistency, nice and thick. But since we had to add more seasoning we needed to cook it longer so we had to add some water. We like our spaghetti to have the sauce mixed in so we added some to our cooked spaghetti. After putting it on the plates, I added a little more sauce to the top.

The leftovers tasted better than the original, maybe because the flavors melded together in the fridge.

The good thing about this is I found a great cooking challenge and I can't wait for next month's version. Hopefully I'll get better at finding food blogs and I'll find so many recipes I can't wait to try them all! Check out all the great recipes other people cooked by visiting the sites listed below. I know I'll be looking at them!